

Open the Anyway app to begin. Business and Agents are two views in the same app, and you can switch between them at any time.
1. Enter the Business view
1
Sign in to Anyway
Open app.anyway.sh and sign in. On first use in a browser, the app opens in the Business view by default; later visits in that browser restore the last view you used.
2
Confirm the Business view
Check the product name at the top of the left sidebar. If it shows Business, continue. If a previous session remembered Agents, open the product switcher and select Anyway Business.
3
Land on Payment setup
A brand-new account is taken once to Settings → Setting up — the Payment setup checklist. It tracks everything required to accept payments and get paid out, grouped by the capability each section unlocks: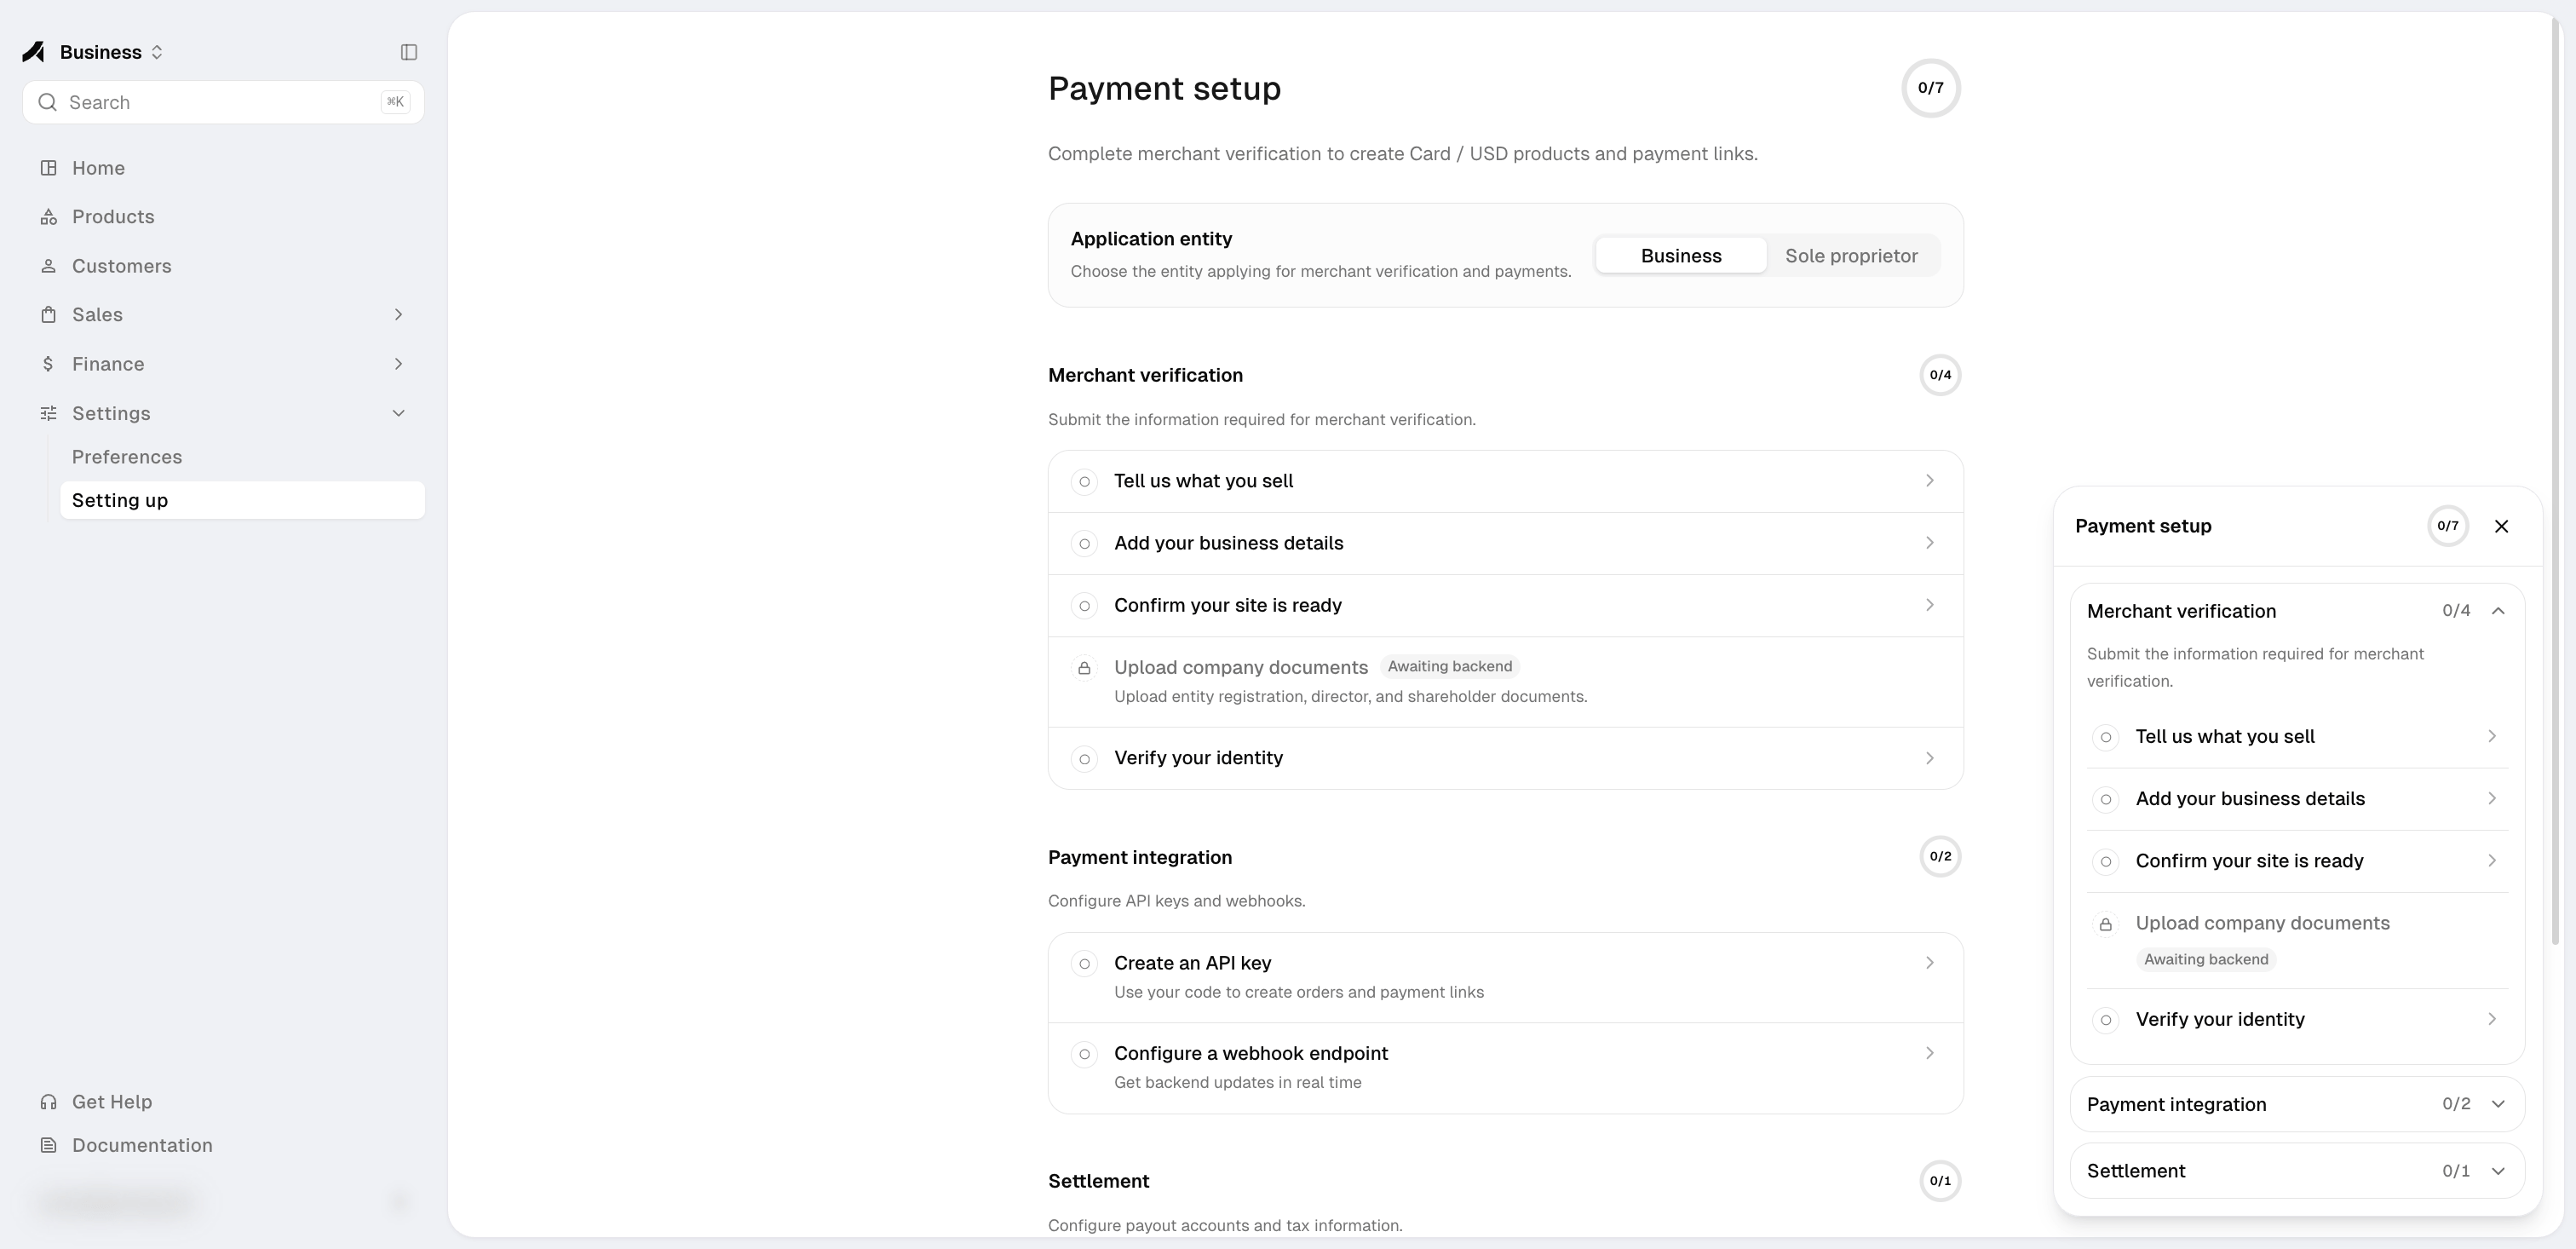
- Merchant verification — unlocks Card / USD products and payment links;
- Payment integration — API keys and webhooks, usable from day one;
- Settlement — payout accounts and tax information.
4
Choose the application entity
At the top of Payment setup, choose whether you apply as a Business or a Sole proprietor. This determines which information merchant verification asks for — a business also adds its business details. The company-documents row shown for businesses is marked Awaiting backend: it cannot be submitted in the app yet and does not count toward completion.
5
Keep the corner card handy
The same checklist stays available as a card in the bottom-right corner on every Business page. Minimise it and the progress count remains visible; it disappears once everything is complete.
6
Confirm the Business navigation
The left sidebar includes Home, Products, Customers, Sales (Subscriptions, Orders), Finance (Income, Payout), and Settings.
2. Complete merchant verification
Complete the Merchant verification section of Payment setup and wait for the status to reach Approved before creating a Card / USD product.1
Open Payment setup
Go to Settings → Setting up. Actions that start, continue, or update the application lead here. While the application is under review, the Payout page offers Refresh status. A rejected application offers Contact support instead.
2
Fill in each verification item
Complete Tell us what you sell, Add your business details (business accounts), Confirm your site is ready, and Verify your identity. Each row opens its form in place.
3
Submit the application
Review the information and submit it for verification.
4
Respond to follow-up requests
If more information is requested, update the application and submit it again.
3. Create a product
1
Open Products
In the Business view, select Products, then Create product.
2
Describe what you sell
Add a product name, description, price, currency, and pricing configuration.
3
Choose a payment method
Choose a payment method and complete the setup shown in the form.
4
Create the product
Select Create Product. Anyway opens a success dialog with Copy payment link, Preview checkout, and Done. Selecting Done returns to Products. You can also open the product and copy its payment link from the overview.
4. Take the first payment
Open the public payment link in a separate browser session to preview the buyer experience. After a successful payment:- the order appears in Orders;
- a platform-collected Card / USD sale appears in Finance after a short processing delay.
5. Prepare payouts
Adding your first payout account is the Settlement item of Payment setup. Merchant verification must be Approved before you can add it. The verification action on the Payout page changes with the application state, and the add-account flow stays locked until approval.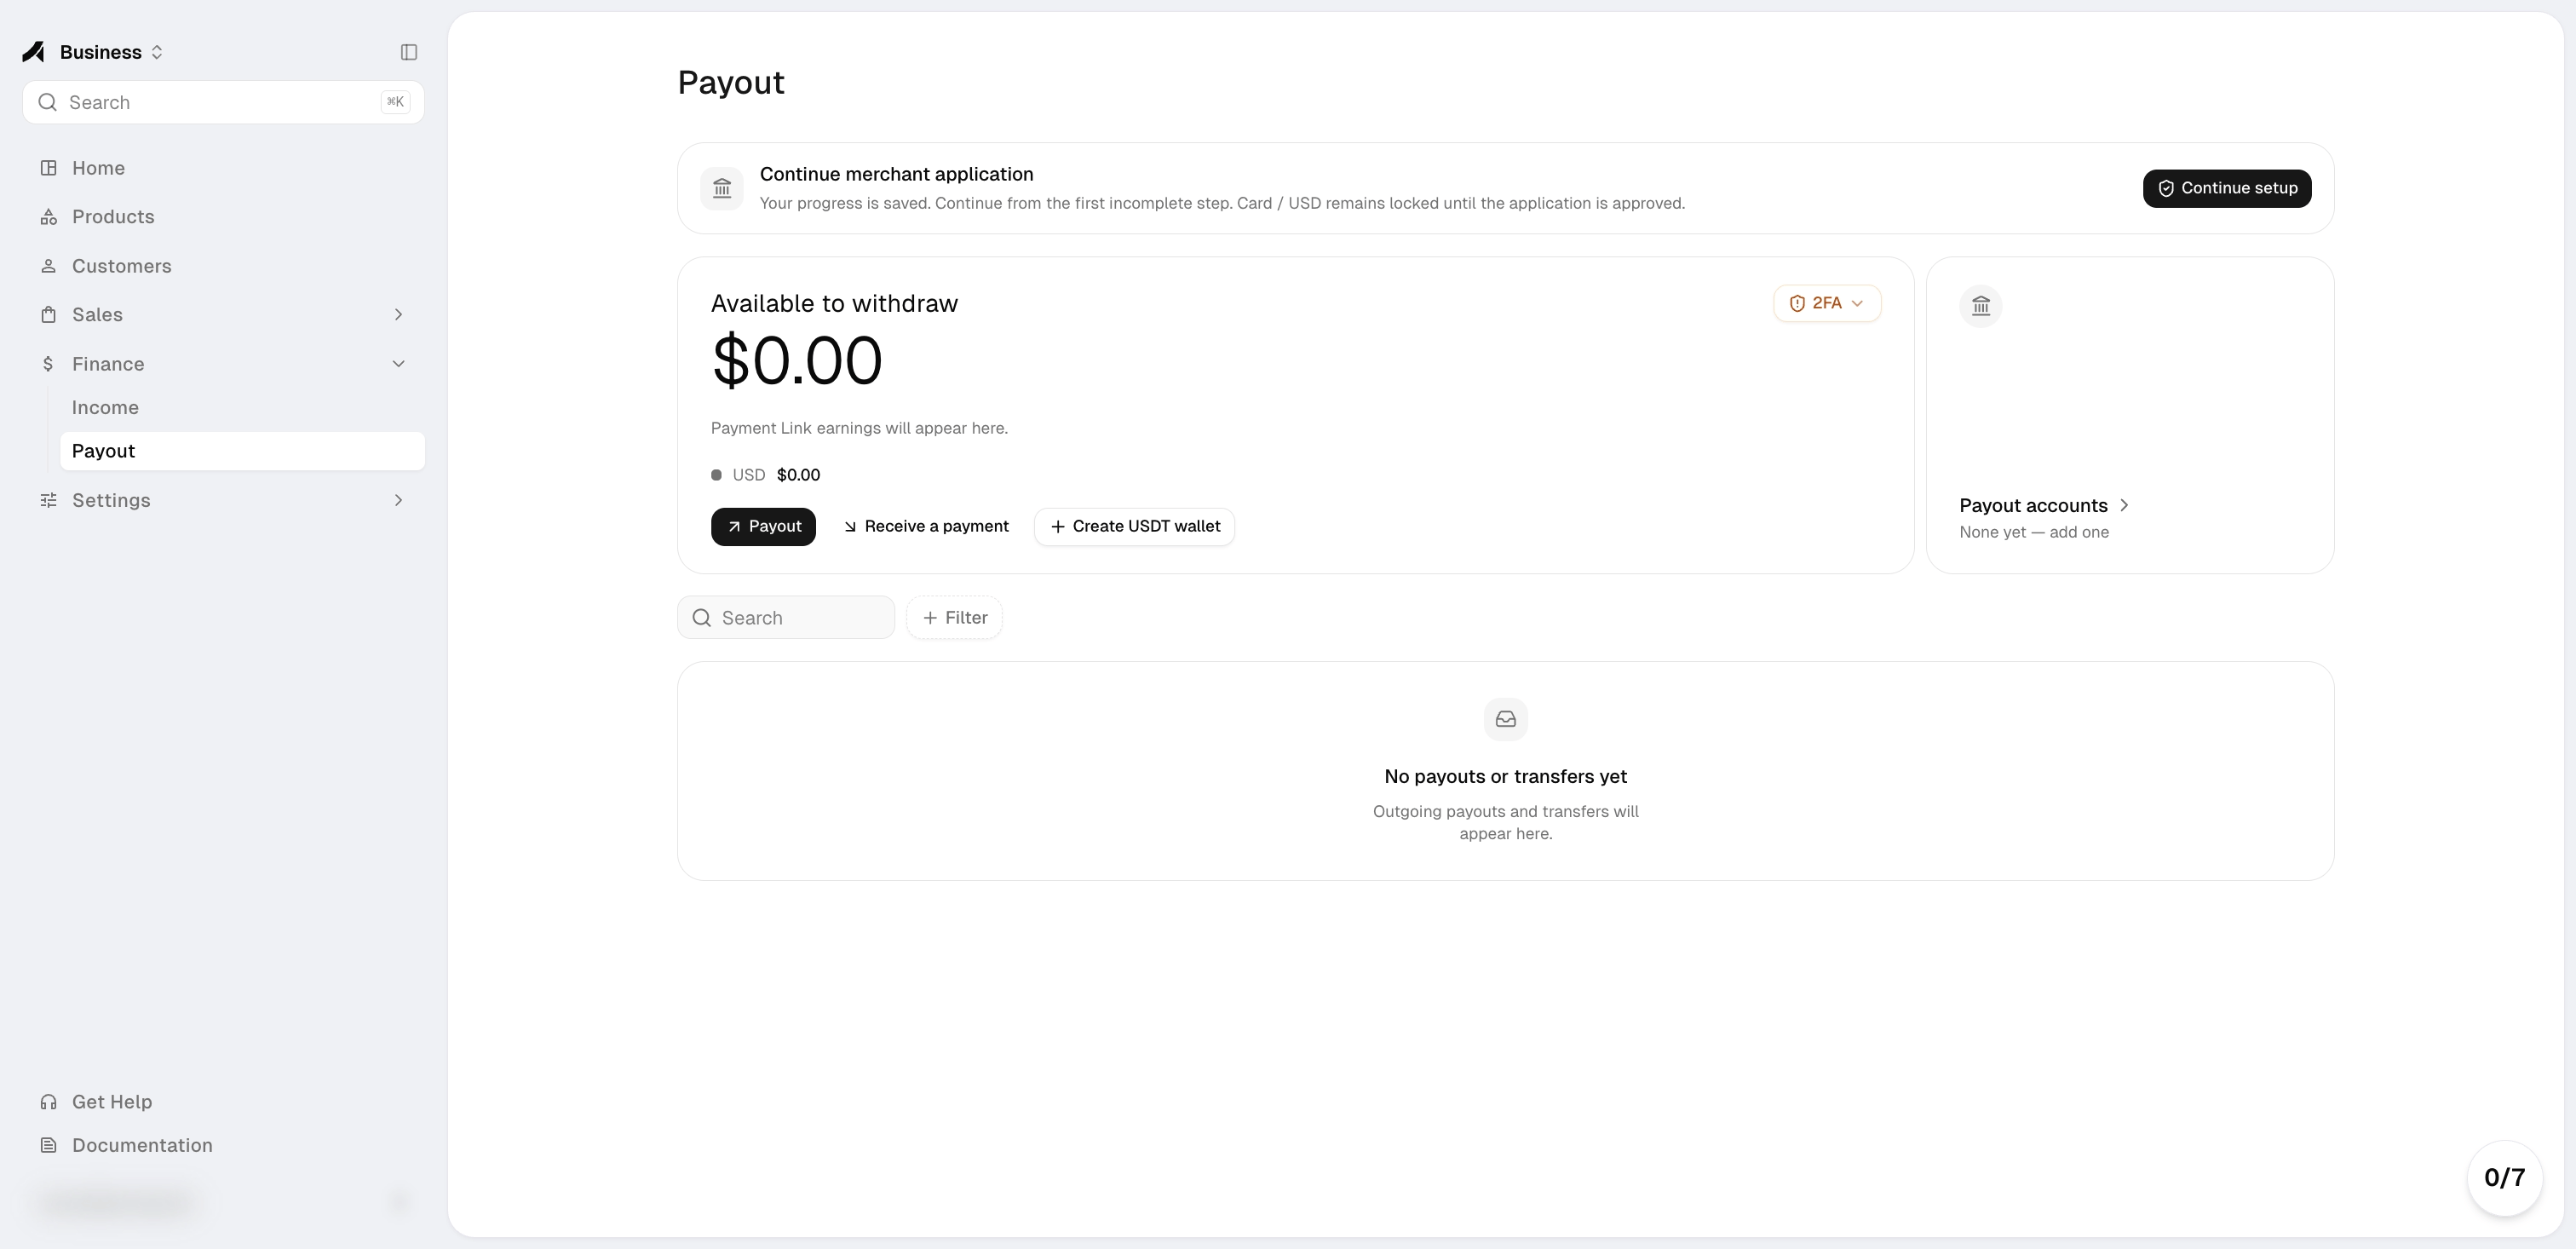
1
Confirm approval
Confirm that merchant verification is Approved.
2
Add a payout account
In Finance → Payout (or from the Settlement section of Payment setup), add a US ACH, UK bank, Hong Kong bank in USD or HKD, Alipay, or China bank payout account.
3
Add other accounts if needed
Save additional payout accounts if your organization needs them.
4
Request a payout
When your available USD balance is at least $50, select a saved account and submit a payout request.
Understand Finance
Learn how balances, transactions, fees, and payout states work.
Follow an order
Match a checkout to its order and Finance transaction.